
One of the key challenges you face as a developer is how to adjust your app’s user interface and optimization among varying display sizes and operating systems. The iOS Simulator in Xcode simplifies the process, allowing you to accurately replicate any app environment directly on your Mac.
Moreover, with Apple’s iOS holding a global market share of nearly 27.6% as of September 2024, knowing how to use simulator apps is crucial for any iOS developer.
This article will walk you through the benefits and use cases of the Xcode iOS simulator — a game-changer for the iOS development industry and a must-have tool for iOS developers. So let’s explore how to boost your productivity with the Xcode Simulator.
What is Xcode?
Xcode is an integrated development environment (IDE) designed for creating secure IOS and macOS apps. The IDE supports Command Line Tools (CLT), emulating a UNIX-style development environment.
In the simplest analogy, you can use Xcode similar to a pen and paper to design, write, and develop apps for the iOS system. Xcode brings together every tool and functionality you need for application development — a build system, text editor, and compiler. Writing, compiling, and debugging functionalities work seamlessly in the Xcode IDE.
What does the Xcode development environment consist of?
The Xcode development environment includes a suite of tools designed to help engineers make research efforts and manage every stage f the workflow. After installing Xcode, you get access to a variety of tools from building and testing an app to optimizing it and finally submitting it to the iPhone, iPad, or Mac App Store.
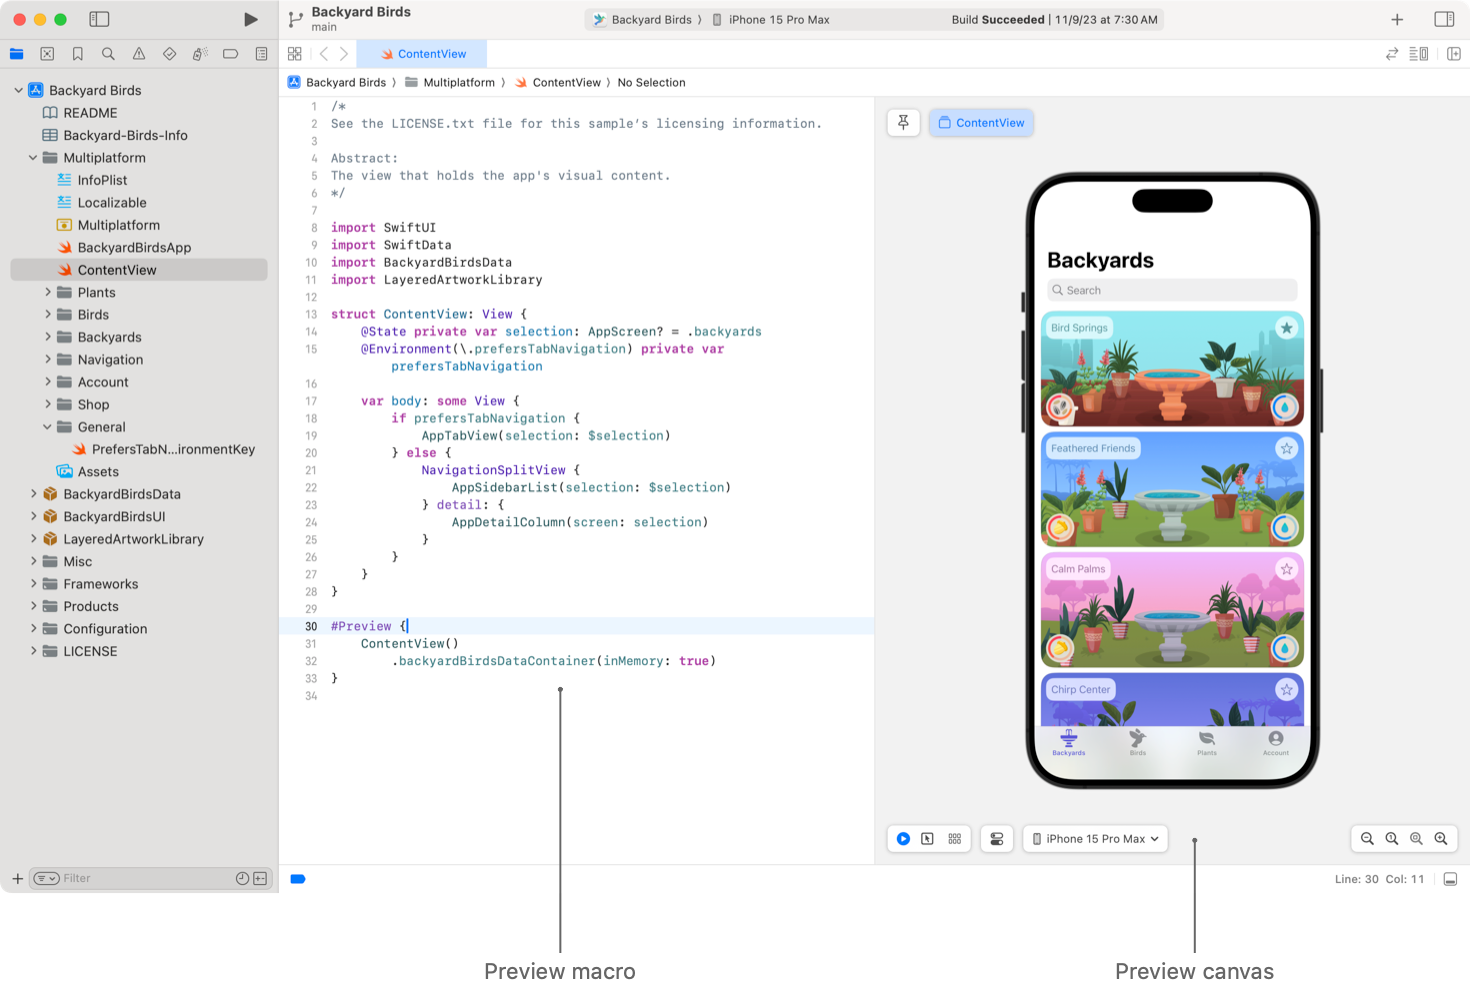
The code editor in Xcode is similar to a regular text editor. it highlights constructs, structures the code, and makes it readable. If there are errors in the syntax, the editor highlights problem areas and explains what is wrong. The developer gets easy navigation through the code in a single window and can use autocomplete at any time to speed up routine tasks. The final file can be saved in different formats.
Source: Apple Developer
💡Note: You can find line numbers in the left toolbar, and switch theme in the settings.
GUI designer. XCode has an Interface Builder application for interface design. With its help, programmers create windows, menus, and other visual elements. They develop them themselves or use the Apple Xcode library, which stores a collection of standard interface elements.
Source: Apple Developer
💡Note: The developer uses Interface Builder to customize the color, font, text placement, or future app icon.
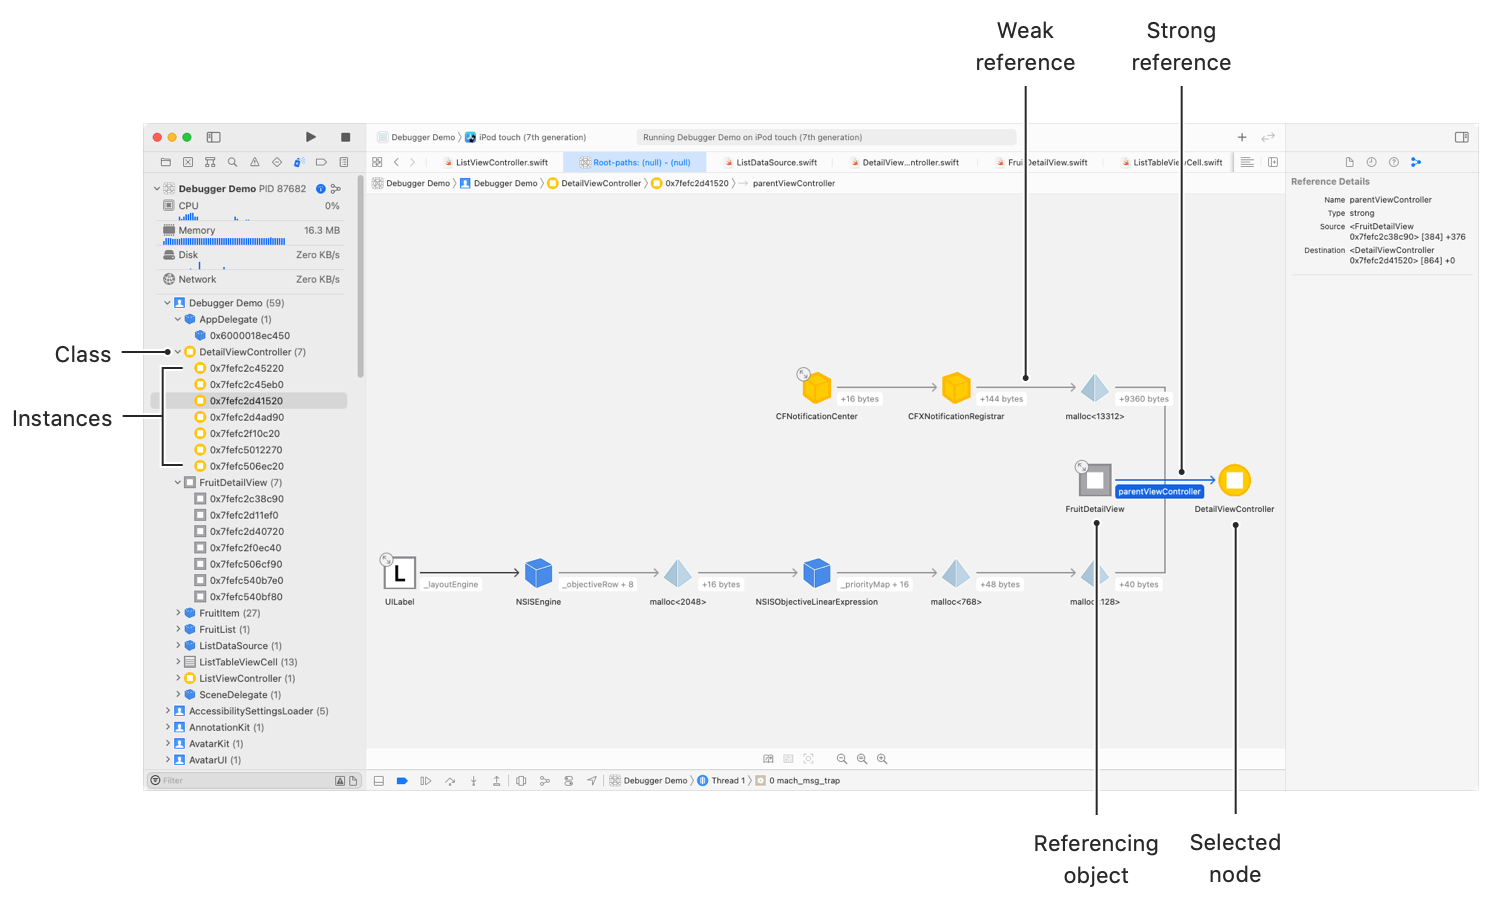
Debuggers are designed to locate and fix errors while displaying how much CPU power the app uses compared to other running apps.
Source: Apple Developer
💡Note: The debug area shows the console output and help to inspect variables when the app is running.
Crash reports and feedback. Programmers have access to detailed crash log reports from TestFlight users. This is a closed space where developers can test the app and quickly get information about the quality of its work.
Source: Apple Developer
💡Note: For example, testers' feedback immediately shows what actions were being performed when the crash occurred.
Team comments. Xcode has a built-in commenting feature that simplifies collaboration. When reviewers comment on lines of code, their names and avatars are displayed next to them.
Source: Apple Developer
💡Note: Any comment can be responded to: disputed or clarified. Sometimes you can find new ideas and meanings in the discussion threads.
Swift Playgrounds. This is an XCode app for iPad and macOS that helps budding iOS developers learn the Swift programming language and create apps as they learn.
Source: Apple Developer
💡Note: Learning in Swift Playgrounds is like a game: you need to solve many puzzles to win and master the concepts of the language at the same time.
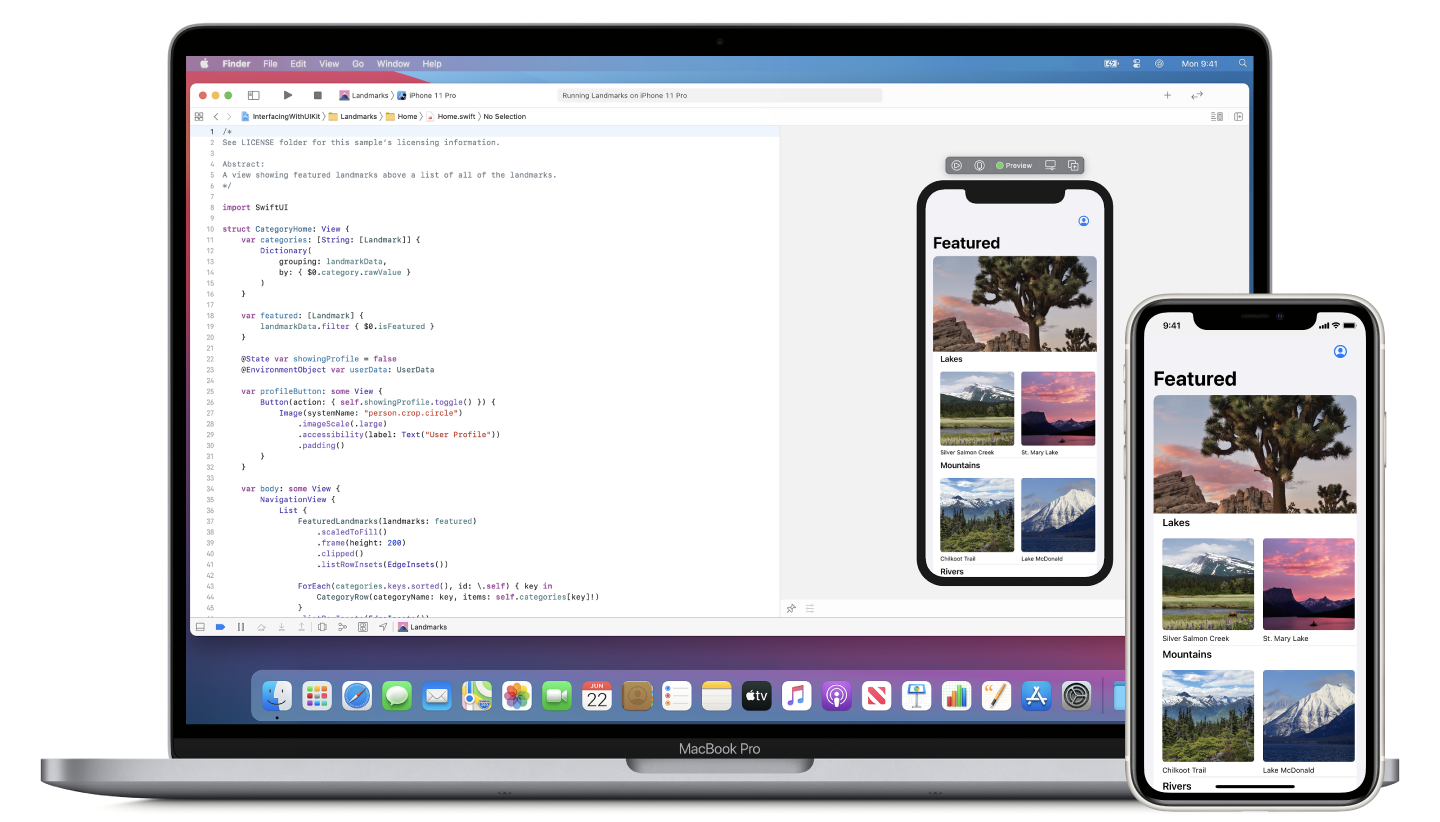
iPhone Simulator. With it, XCode “stages” the launch on iPhone, iPad, and other simulated or actual device type so that programmers understand how applications work for users on a phone, tablet, and computer. In other words, it’s a tool for creating a simulated environment for your application.
Source: Apple Developer
3D editors. For example, Reality Composer is a simple augmented reality editor for iOS, iPadOS, and Mac. It allows developers to create 3D models for games and augmented reality.
Source: Apple Developer
Compilers. Developers write code, and compilers translate it into a language only a computer can understand and make a finished application from it. When a programmer tells Xcode to build a project, the build system analyzes the files and uses the project settings to assemble a set of tasks to run.
💡Note: The programmer can use the project settings to change the build process and add tasks that are needed to complete the work.
Adaptability. XCode allows you to create adaptive applications that are rebuilt to the desired size and position on the screen.
💡Note: For example, if we are talking about different iPhones, XCode will offer extensions for different iOS versions. Applications can be created for several Apple operating systems at once: iPhone, iPadOS for iPad, macOS for computers, watchOS for Apple Watch, tvOS for Apple TV.
Documentation. Apple provides a lot of helpful information, which explains in detail about XCode and its tools. It is better to always keep the instructions at hand, like a legal cheat sheet.


Thank you for Subscription!
What is the Xcode iOS simulator?
The Xcode Simulator app is an integral part of the Xcode environment. Keeping definitions in mind, you may ask how Xcode Simulator can help in your app development.
Simply put, a Simulator lets you mimic the user interface of real device-specific features for which you are developing an app. With the first stable version released in late 2003, Xcode Simulator helps you develop apps for the entire iOS ecosystem, including iOS, macOS, iPadOS, tvOS, and watchOS.
You can use iOS Simulator launches to run apps directly from your macOS kernel and replicate the experience of your end-level users to a great extent. The convenience is so high that almost every app developer nowadays runs and tests apps on a simulator as part of a daily routine.
But does a simulator give you the same experience as running the app on physical devices?
Real devices vs. Simulators
Although a simulator goes a long way to replicate the user experience of a physical device, it has certain limitations. Here are a few differences to keep in mind:
Computation and network. Real devices usually have lower processing power and hardware specific features than Xcode Simulator because the simulator will have access to your Mac’s processor and memory management.
Also, compared to your iPhone, you will get a more stable network on your MacBook. You may find it difficult to simulate your app’s behavior during real-life network fluctuations if you use a simulator.
Display. The display size, resolution, and color settings of your MacBook will not be the same as your other physical devices, such as an iPhone or Apple Watch. As a result, your images and text may look blurry or over-sharpened.
The iOS simulator in Xcode has specific tools to mitigate this effect as much as possible. We will check that out too in this article.
Framework differences. Simulators may not support a few of the integrated functions native to a device’s framework. For example, you will not get the following frameworks to run in an iOS simulator:
MessageUI
ARKit
IOSurface
HomeKit
Xcode Simulator has included a complete list of differences and unsupported frameworks in its documentation and Help section. By navigating from the Simulator menu, you can check that out: Help > Simulator Help.
Hardware limitations. Finally, you will have to deal with some hardware differences when opting for a simulator instead of a real device. The hardware differences are mostly related to the use of sensors and input systems. For instance, you will not get to use the following components:
Ambient light sensors that help adjust your device’s display brightness depending on the environment’s lighting
Cameras
iOS simulator Bluetooth
Accelerometers, gyroscopes, and similar motion sensors that detect your device’s motion and adjust the app’s behavior accordingly
Proximity sensors
Barometers and similar environmental sensors
Audio input (You can, however, use Siri to input audio in a simulator on Mac by navigating to Hardware > Siri.)
Knowing these differences and limitations will help you choose between a simulator and a physical device to try out your intended features. You can use a target device to test certain features and a simulator for the supported platforms.
Having established the difference, let’s see how you can configure the iOS simulator in Xcode.
How to open the simulator in Xcode and set it up?
To use the Xcode iOS simulator, you will first need to set up and configure it properly. Here is a step-by-step guide on how to do it. While Xcode 13 is the latest version, we have used Xcode 12 in this tutorial due to greater availability.
Step 1. Open Xcode 12. However, you may choose any version of Xcode, as the basic process is similar.
Step 2. Navigate to Window from the menu.
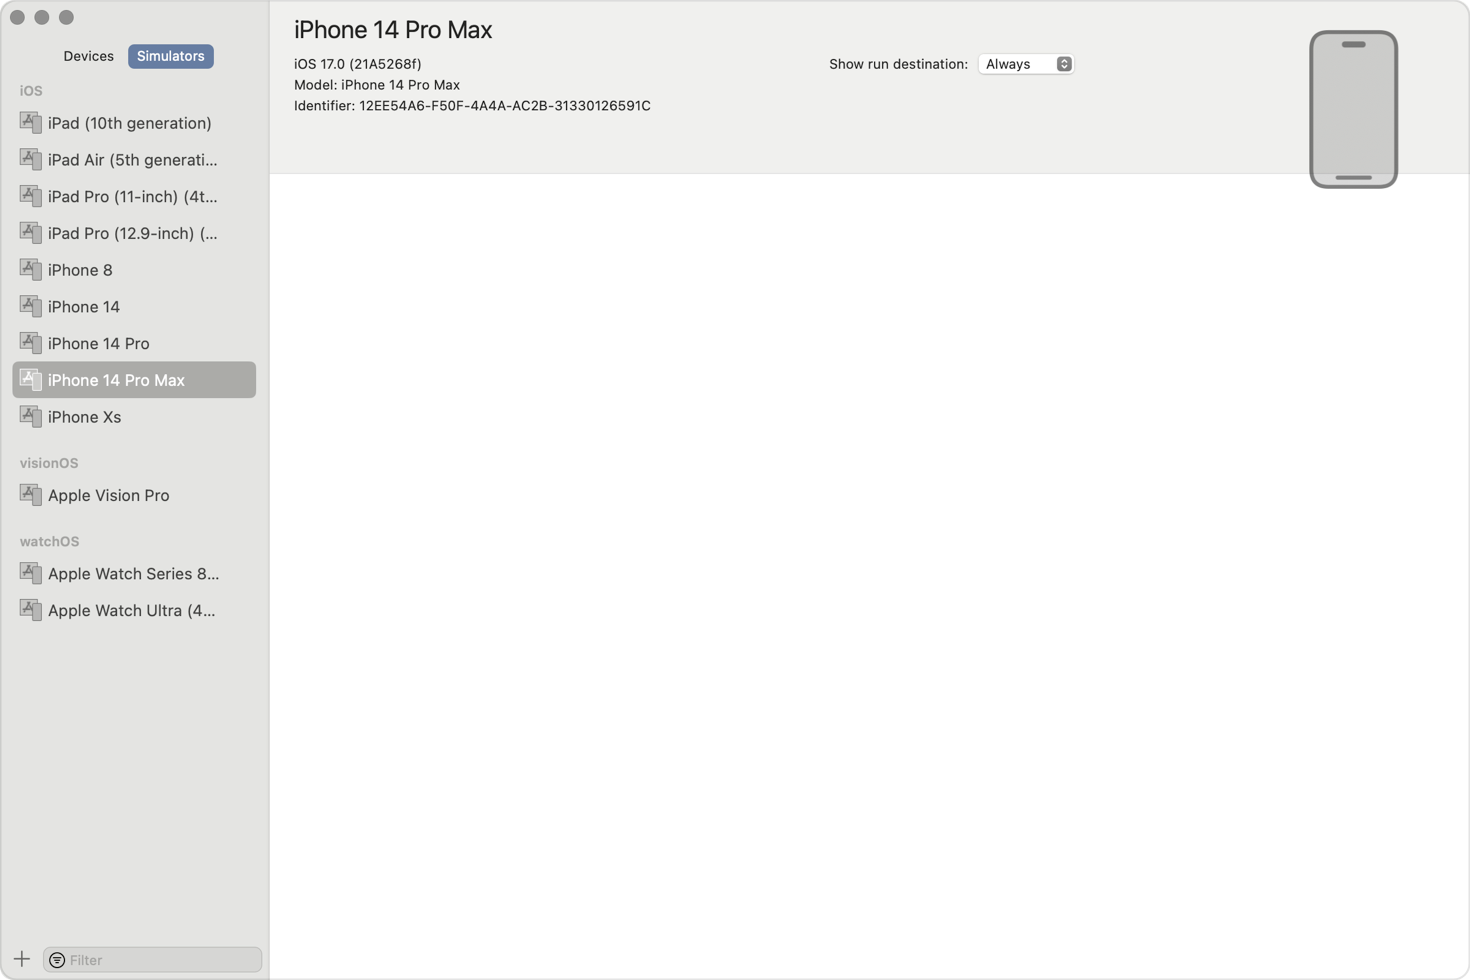
Step 3. Select Devices and Simulators from the Xcode menu. It will open a list of supported devices and simulators in Xcode.
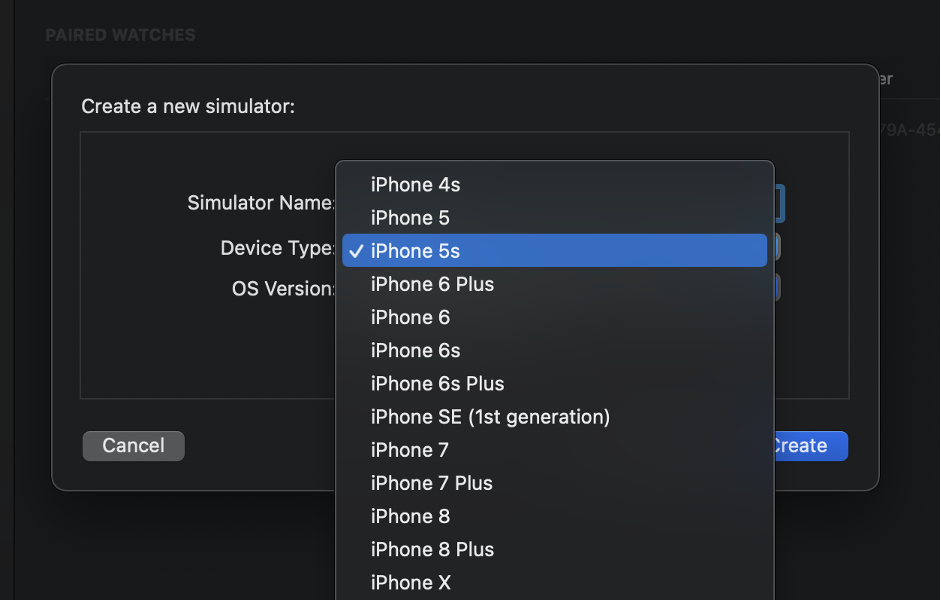
Step 4. Select the Simulator tab, which lets you add or remove special simulators. You can also choose the required macOS or iOS version and target device size, then pair the real device with iWatch and the other relevant settings from the simulator option.
Step 5. Now, it’s time to run the simulator based on your built codes. Simply click the Play or Run button in the Xcode interface after choosing the intended simulator.

Step 6. Xcode will then compile your app and validate the code for any errors. If the code has no errors, it will run the app on the selected iOS simulator.
💡Note: When you open Xcode 14 or later for the first time, a dialog appears showing which Simulator runtimes are built-in and which are available for download.
A Simulator runtime is an embedded OS package that the Simulator uses to run your app on a simulated device in Xcode. For instance, when you test your app on a simulated iPhone running iOS 18, the Simulator loads the iOS 18 runtime for that simulated device.
Now, we will take a more detailed look at configuring Xcode Simulator to make it perform better in replicating the app environment of an iOS device.
Adjusting Simulator size
The Windows menu of Xcode Simulator will let you choose different devices scaling options to adjust the size of the simulator for your selected one. You will have four options to choose from, as shown below.
Physical size. Select the physical size if you want the Simulator window to match your device’s actual display size. This can accurately show you how your app would appear in various screen sizes.
Point accurate. This option will make the window appear the same sizes across various windows. Therefore, what you will see on a smaller iPhone display will remain the same when you see it on a larger Mac display.
Pixel accurate. This mode will keep the total pixel count the same across all devices. Thus, the larger screen of your Mac may display a pixelated image compared to an iPhone display due to less pixel density.
Fit screen. The “fit screen” function will make your Mac window match your iPhone’s display size.
You may also use this shortcut to choose the screen size: ⌘ + 1-4

Related post
iOS app security: Essential steps to take
Enhance your app's security today! Discover essential strategies and best practices to protect your iOS applications from potential threats.
Read nowSetting a location or route
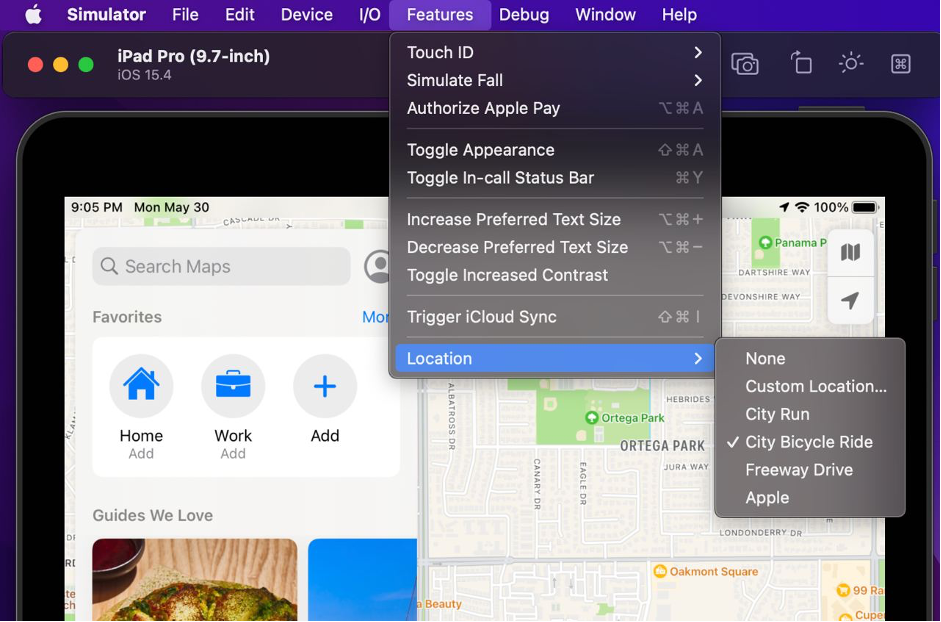
You will often need your iOS application to demonstrate a location-specific behavior. Do it easily with the Xcode iPhone simulator. You may either set a specific fixed location within Simulator or send locations and route-planning from your Mac to Simulator.
Here are two more location-related options you can set.
Present location
You can use one of the following present locations from the Features menu:
Apple
City Bicycle Ride
City Run
Freeway Drive
No location
Alternatively, if your iOS application does not need any location specifications, you can instead choose the “no location” option. To set Xcode iPhone Simulator to no location, choose Simulator > Features > Location > None.
Simulating a memory warning
A simulated memory warning helps determine if your app is using excessive memory and might exceed the device’s capacity. You will find the option in the Debug menu.
Once enabled, it will send low-memory warning notifications to your app.
Slowing animations
Slow animation testing is a crucial feature of Xcode Simulator, allowing you to observe if an animation is playing correctly. You can find it in the Debug menu. After enabling it, you can see exactly how the elements move or change.
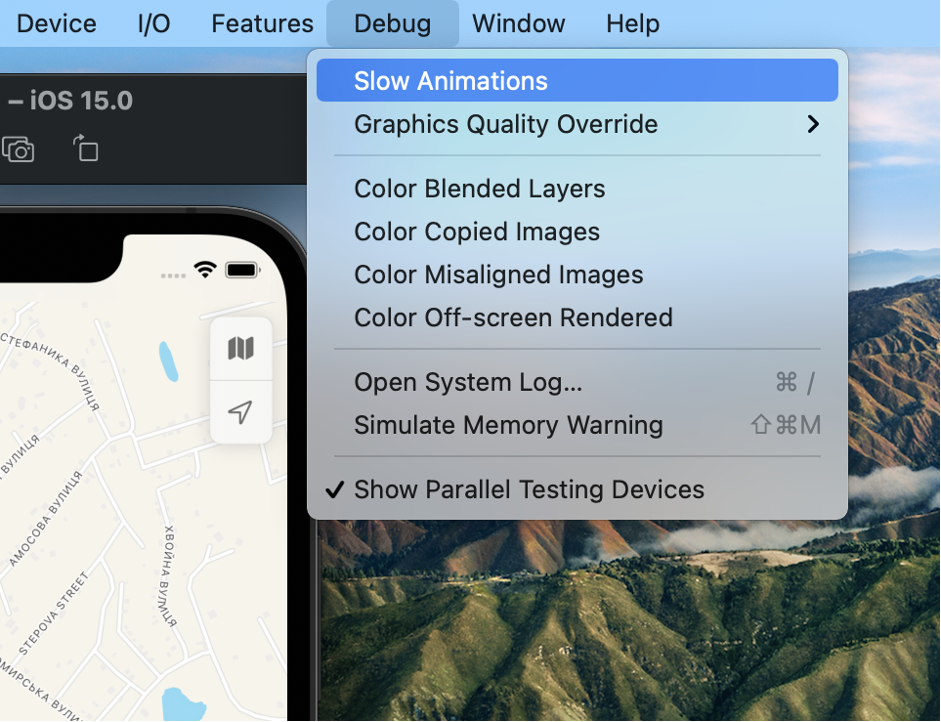
You can easily identify any problems related to rendering, skipped frames, and performance issues. Clicking it again will return it to normal speed. A checkmark will indicate the animation speed.
Simulating Apple Pays
Apple Pay enables users to make payments directly from their iOS and watchOS devices. You can test this functionality with Xcode Simulator to determine whether the payment flow works as intended.
First, present a payment sheet from your app, and then choose Authorize Apple Pay from the Hardware menu.
Then, use the following command lines to retrieve payment details and data from the payment sheet and create an empty encrypted blob.
paymentAuthorizationControllerWillAuthorizePayment,
and
paymentAuthorizationControllerDidAuthorizePayment
Debugging view frames
Frame debugging helps you find out whether the view of each frame is correctly aligned. You can customize your view using Xcode iPhone Simulator to replicate the view you will get for each app frame.
Follow this path to enable the feature:
Xcode > Debug > Debug View > Show View Frame
Adding photos or videos
Xcode Simulator for iOS lets you import photos, videos, and contacts to your device’s library. You can also import contacts in vCard format.
To enable this, open Terminal and enter the following command lines:
simctl addmedia [... ]
xcrun simctl addmedia booted ~/Desktop/test.png
Using status bar features
There are two major status bar features you can test:
Toggle in-call status bar
The in-call status bar helps you see how your app’s interface will look during a call. Access this feature from the Hardware menu. You can toggle it between a normal state or an in-call state, including when a FaceTime call is in progress.
Change bar options
The “change bar” options let you ignore and override the typical status bar status. Usually, your app would display the battery and network statuses as full, which you can change using Simulator.
Simulating the shake gesture
Do you need to shake your Mac to test the shake gesture feature physically? No! Thanks to Xcode Simulator, you can enable the shake feature from the Simulator menu and see what the users would experience when they try to provide feedback with a shake gesture.
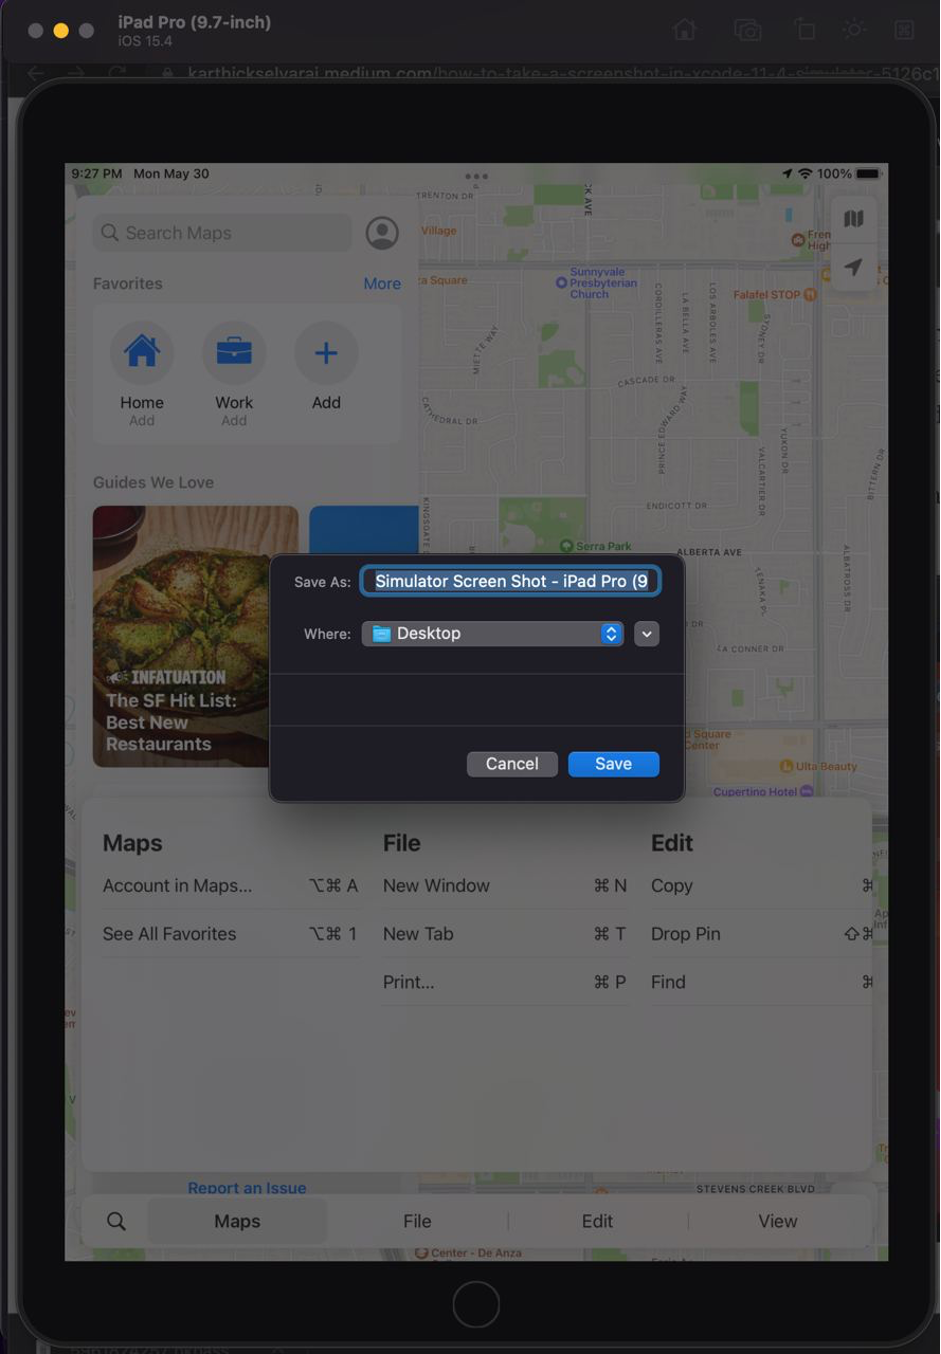
Taking a screenshot
You may need your app screenshots for many purposes, including submitting it to the App Store or promoting it on social media. You can take a screenshot using the following command:
xcrun simctl io Demo screenshot screenshot.png --type="png"
It will take a screenshot of the current screen and save it as a .png file. You can also use Option + Cmd + S to take a screenshot, as well as the SaveScreen button.

Recording a video
Having a video of your app can be very useful in certain situations, especially if it shows how to use it. Use the following command lines to start recording in Xcode Simulator:
xcrun simctl io Demo recordVideo Video.mov --codec="h264"
Once you are done, press Control+C or Stop button to stop recording.
Managing privacy permissions
You can use the simctl subcommands to manage and issue privacy permissions. You can modify the following permission parameters:
Grant
Revoke
Reset
Here’s how the command may look:
simctl privacy []
So, if you are granting location permission, it would look something like the following command line:
xcrun simctl privacy booted grant location com.example.app
Need professional assistance?
Geniusee develops products and services and provides consultancy and support for various clients and partners. The expert tech company has completed over 100 projects on time and within the budgets in various business domains. Geniusee’s versatile tech team is proficient in 64 actively used technologies. They also have dedicated teams to support your iOS app development needs.
Summary
Xcode helps you avoid potential disruptions that may hamper your iOS development experience. You can quickly get into the flow and experience what a typical user would see. Xcode enables app developers to test apps for the iOS ecosystem right from their Mac computers, free of cost.